Web logic - JMS
Queue Setup
|
I am going to walk
you through the steps required to setup JMS Server, Queue, and Connection
Factory on Web logic Server.
Step 1: Creating a
JMS Server
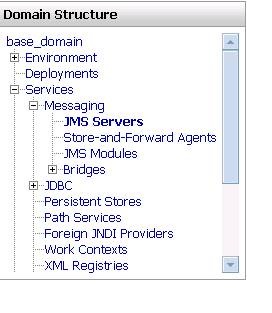
Under Domain
Structure, Click on Services > Messaging >JMS Servers
On the JMS Servers
Page, Click on “New” button. On the Create a New JMS
Server page, provide a name for your JMS Server. E.g.
Test JMSServer

You can click on Create a New Store button to create a
persistent store if you want to save your messages other wise no need to do
this.
If you have clicked
to create a new store, in the next screen, you would need to select store
type. We have two types. One is JDBC Store and another is File Store.
Using JDBC store,
you can save messages to a database. For now, let use File Store.

Select File Store
from the drop down and click Next

Enter a name for the
file store. E.g. TestFileStore
Select the Server
instance for this store. E.g. AdminServer
Enter path to the
directory where the file can be saved. E.g. c:\jms\store
Click Finish.
On the screen,
select the Persistent Store (E.g. TestFileStore) we just created and click Next.

On the next screen,
we need to select the Target Server instance where you would like to deploy
this JMS Server.

Select the Target
Server from the dropdown list and click Finish to complete the JMS
server creation. Make sure you Activate the changes.
You should now
find your new JMS Server in the JMS Servers List.

Step 2: The next
step is to create a JMS Module.
A JMS Module is a
way for packaging JMS resources such as Queues and topics.
Here are the steps
to create a JMS module:
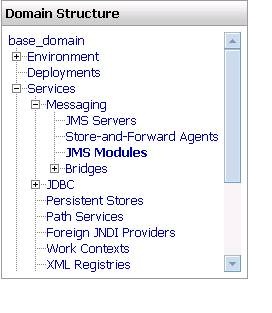
Under Messaging,
Click on JMS Modules.
Click on New button on the JMS
Modules screen

On the Create JMS
System Module screen, enter name. E.g. TestJMSSystemModule
You can leave other
fields empty if you want.
Click Next and select the
WebLogic server you would like to target (ideally, this would be the same
server that is hosting the JMS server you created above).

Click Next button.
On the next screen
hit Finish and Activate changes.

You should now see
the JMS Module in the JMS Modules List.

Step 3: create a
Distributed Queue


Click Next.
On the next screen,
hit Create a New Subdeployment.
A Subdeployment is a
convenient way for grouping and targeting JMS module resources.

Provide a name for
the subdeployment (E.g. Test Subdeployment) and hit “OK”.

On the next screen,
Make sure you pick the subdeployment you just created for subdeployments.
Select the target
JMS Server we created (E.g. Test JMSServer) and Click “finish”.

You should now see
the Queue created. Do not forget to activate the changes.

Step 4: Creating JMS
Connection Factory
For clients to
connect and use JMS resources, a JMS Connection Factory is needed.
Here are the steps
for creating a Connection factory:


Select “Advance Targeting” and on the next
page

Select the
Subdeployment you created above (Test Subdeployment). Wait for the page to
refresh itself and hit Finish

You should now see
the connection factory we just created in the Summary of Resources.

This completes the
JMS Queue Set up on Weblogic.
|
Simple Client Program to interact with the
JMS Queue:
package bamrunner;
import java.util.Hashtable;
import javax.naming.*;
import javax.jms.*;
public class JMSSender {
private static InitialContext
ctx = null;
private static QueueConnectionFactory
qcf = null;
private static QueueConnection
qc = null;
private static QueueSession
qsess = null;
private static Queue q = null;
private static QueueSender
qsndr = null;
private static TextMessage
message = null;
//
NOTE: The next two lines set the name of the Queue Connection Factory
// and the Queue that we
want to use.
private static final String
QCF_NAME = "jms/QueueConnectionFactory";
private static final String
QUEUE_NAME = "jms/OPOQueue";
public JMSSender() {
super();
}
public static void
sendMessage(String messageText) {
//
create InitialContext
Hashtable properties = new Hashtable();
properties.put(Context.INITIAL_CONTEXT_FACTORY,
"weblogic.jndi.WLInitialContextFactory");
// NOTE: The port number of the server is provided in the next line,
// followed by the userid
and password on the next two lines.
properties.put(Context.PROVIDER_URL, "t3://localhost:9001");
properties.put(Context.SECURITY_PRINCIPAL, "weblogic");
properties.put(Context.SECURITY_CREDENTIALS, "welcome1");
try {
ctx = new InitialContext(properties);
}
catch (NamingException ne) {
ne.printStackTrace(System.err);
System.exit(0);
}
System.out.println("Got InitialContext " + ctx.toString());
//
create QueueConnectionFactory
try {
qcf = (QueueConnectionFactory)ctx.lookup(QCF_NAME);
}
catch
(NamingException ne) {
ne.printStackTrace(System.err);
System.exit(0);
}
System.out.println("Got QueueConnectionFactory " + qcf.toString());
//
create QueueConnection
try {
qc = qcf.createQueueConnection();
}
catch
(JMSException jmse) {
jmse.printStackTrace(System.err);
System.exit(0);
}
System.out.println("Got QueueConnection " + qc.toString());
//
create QueueSession
try {
qsess = qc.createQueueSession(false, 0);
}
catch
(JMSException jmse) {
jmse.printStackTrace(System.err);
System.exit(0);
}
System.out.println("Got QueueSession " + qsess.toString());
//
lookup Queue
try {
q = (Queue) ctx.lookup(QUEUE_NAME);
}
catch
(NamingException ne) {
ne.printStackTrace(System.err);
System.exit(0);
}
System.out.println("Got Queue " + q.toString());
//
create QueueSender
try {
qsndr = qsess.createSender(q);
}
catch
(JMSException jmse) {
jmse.printStackTrace(System.err);
System.exit(0);
}
System.out.println("Got QueueSender " + qsndr.toString());
// create
TextMessage
try {
message = qsess.createTextMessage();
}
catch
(JMSException jmse) {
jmse.printStackTrace(System.err);
System.exit(0);
}
System.out.println("Got TextMessage " + message.toString());
// set
message text in TextMessage
try {
message.setText(messageText);
}
catch
(JMSException jmse) {
jmse.printStackTrace(System.err);
System.exit(0);
}
System.out.println("Set text in TextMessage " + message.toString());
//
send message
try {
qsndr.send(message);
}
catch
(JMSException jmse) {
jmse.printStackTrace(System.err);
System.exit(0);
}
System.out.println("Sent message ");
//
clean up
try {
message = null;
qsndr.close();
qsndr = null;
q = null;
qsess.close();
qsess = null;
qc.close();
qc = null;
qcf = null;
ctx = null;
}
catch
(JMSException jmse) {
jmse.printStackTrace(System.err);
}
System.out.println("Cleaned up and done.");
}
public static void main(String
args[]) {
sendMessage("test");
}
}
No comments:
Post a Comment